Plywood is much loved in the maker community, where combined with laser cutters, it's a relatively cheap (compared to solid wood) and is an extremely ideal way to prototype projects, or produce the final product out of the material. Plywood comes in several colours and types of wood, each producing a different look for your project pieces.
In this article, we will talk about types of plywood quality grading, usage combined with a laser cutter, how to deal with leftover scraps, and a small project demonstration with Cuttle.xyz.

BUT WHAT IS IT?
Generally, the material category of plywood is a manufactured wood made by glueing together several — but at least 3 — sheets of thin wood veneers using resin mixture, with the grains running alternately along the sheet and then across it. The top and bottom layers are always made out of more expensive timber compared to the inner layers, which serve as structural reinforcement. Plywood therefore means a type of processed material with multiple layers (ply) to build up its structure. A hardy, generally strong material, which when processed and prepared well for projects, can withstand weather conditions to a degree, and can last for several years to come indoors. Plywood is a durable building material for both exterior- and interior walls.
There is a similar sheetmaterial made of wood which is also often used in DIY and hobby projects: MDF (Medium Density Fibreboard). These sheets are made by breaking down hardwood or softwood residuals into fine particles, combining it with wax and a resin binder and applying high temperature and pressure. MDF is more tricky to laser cut due to all these adhesives. OBS (Oriented Strand Board) is also similar in principle, but also quite different. Here is an informative and comparison video between plywood and OBS by Belinda Carr.
One would think that sawing plywood is more finicky and time consuming than using a laser cutter for the job! Time consuming: that can be true. However, considering that the layers are pieced together by glue and resin, it consists of multiple layers and will generate smoke (which also contains that adhesive in the form of resin producing that grey smoke as it burns the edges!); the base wood type used to make sheets varies, the density of said wood and therefore its hardness will be different as well: there are a few things to keep in mind before jumping into using plywood for your laser cut projects.
Ensuring optimal parameters and establishing effective process control can help overcome these challenges and produce excellent results when laser cutting plywood!

TYPES OF PLYWOOD
Plywood can be made of several types of trees, each having different density and hardness. A system called the Janka Scale helps to give an idea on this subject, but in general the material is either made of hardwood or softwood. Softwood plywood base materials are for example: cedar, douglas fir, pine, redwood, spruce. Hardwood plywood can be alder, ash, bamboo, beech, birch, cherry, hickory, mahogany, maple, oak, poplar, teak, walnut, wenge, zebrawood, to name a few.
Aircraft plywood stands for the industry it was used in, and can be either softwood or hardwood. Think of those model aircrafts and toys made out of thin sheets of wood: those are made of balsa wood (though these sheets are normally single layer material). But during World War II, aircraft plywood was used for aircraft construction, and these were usually birch or African mahogany. Using balsa wood for models can open up the doorway to very fun projects to pick up if you have a laser cutter.
Other types of plywood are: exterior plywood, lumber core, marine plywood, overlaid plywood and structural plywood. But we will not get into those in our present article, as they are often too thick to be cut with a laser cutter efficiently! Some of those can be 5-7 ply or even 13 (often called multi-ply), which would take a lot of passes to cut through. Plywood is always made out of 3 layers unrelated to the overall thickness of a sheet, hence the odd numbering.

GRADING OF PLYWOOD
Grading of plywood is not the same across softwood and hardwood!
In the case of softwood plywood, each veneer contains two grades, one for the “face” veneer and the other for the “back” veneer. There are four grades of plywood veneer: A, B, C, and D.
A-grade plywood is the highest quality. While it will cost more, the time savings can be worth it for projects that will be visible to the eye. This type of plywood is smooth and easy to paint.
B-grade plywood usually has minor flaws that may require small repairs. It is slightly less smooth.
C-grade plywood has more visible flaws and knots up to 1.5 inches (38.1mm) in diameter.
D-grade plywood can have large flaws and knots up to 2.5 inches (63.5mm) in diameter. This is typically the cheapest grade of plywood veneer.
The first letter refers to the grade of the face of the plywood, and the second letter refers to the back. Therefore, “AB” plywood would have an A-grade face veneer and a B-grade back sheet.
The grading system for hardwood plywood is a little different. Like softwood, the face veneer is represented by letters, and A is the highest quality and D is the lowest quality. However, there is a different standard for backs: 1 is the best and 4 is the worst. A1 hardwood plywood represents the top quality plywood, and D4 the lowest quality (but most cost-effective) plywood.

At base, plywood is rather structurally stable compared to solidwood, but it may crumble and split along the layers.
Knots and cosmetic flaws are not the only quality marks one should be aware of. Plywood may have holes/gaps inside, between the layers, which is not a problem when you are using it as building material. However, these can be critical for your laser cut projects: if you happen to cut over an area with such an inner flaw, you might end up having to redo your piece again. A trick to see if your sheet has a gap inside is to hold the plywood towards the sun, which will make you see through thinned areas, just like your skin when you shine strong light through it. Using a torchlight on your phone works similarly! Some hardware stores will fill external surfaces with visually not appealing gaps with a mix of plaster and resin, tinted to have a similar colour as the wood itself. This is not visible in a rush, so take your time to look through all the sheets available and pick the one which suits your project best.
Another annoying thing can be bent or curved plywood. In reality, every sheet of plywood you ever come across, will have at least a little warp in it. If you are working with sheets as small as an A4, the method to flatten them is straightforward: steam the sheet over a boiling pot of water on the side which is bent to a concave curve, after about 10 minutes, remove it and place it under heavy objects to keep it flat while it dries. To keep your object (such as books) away from moisture damage, you can wrap the plywood in fabric or alufoil. The general rule is that you give 20 minutes of steaming to every 25mm thickness of wood you are using, but this also depends on the density of the plywood (poplar will take less time than birch for example). If you have to deal with bigger pieces of material, water is still the way: spray the surface drenched and smooth it out with a sponge, tapping it, then clamp every side and corner to a table or countertop, and place something very heavy on it. Cover the surface with something to prevent moisture damage to the weight. You can read more on flattening plywood here.
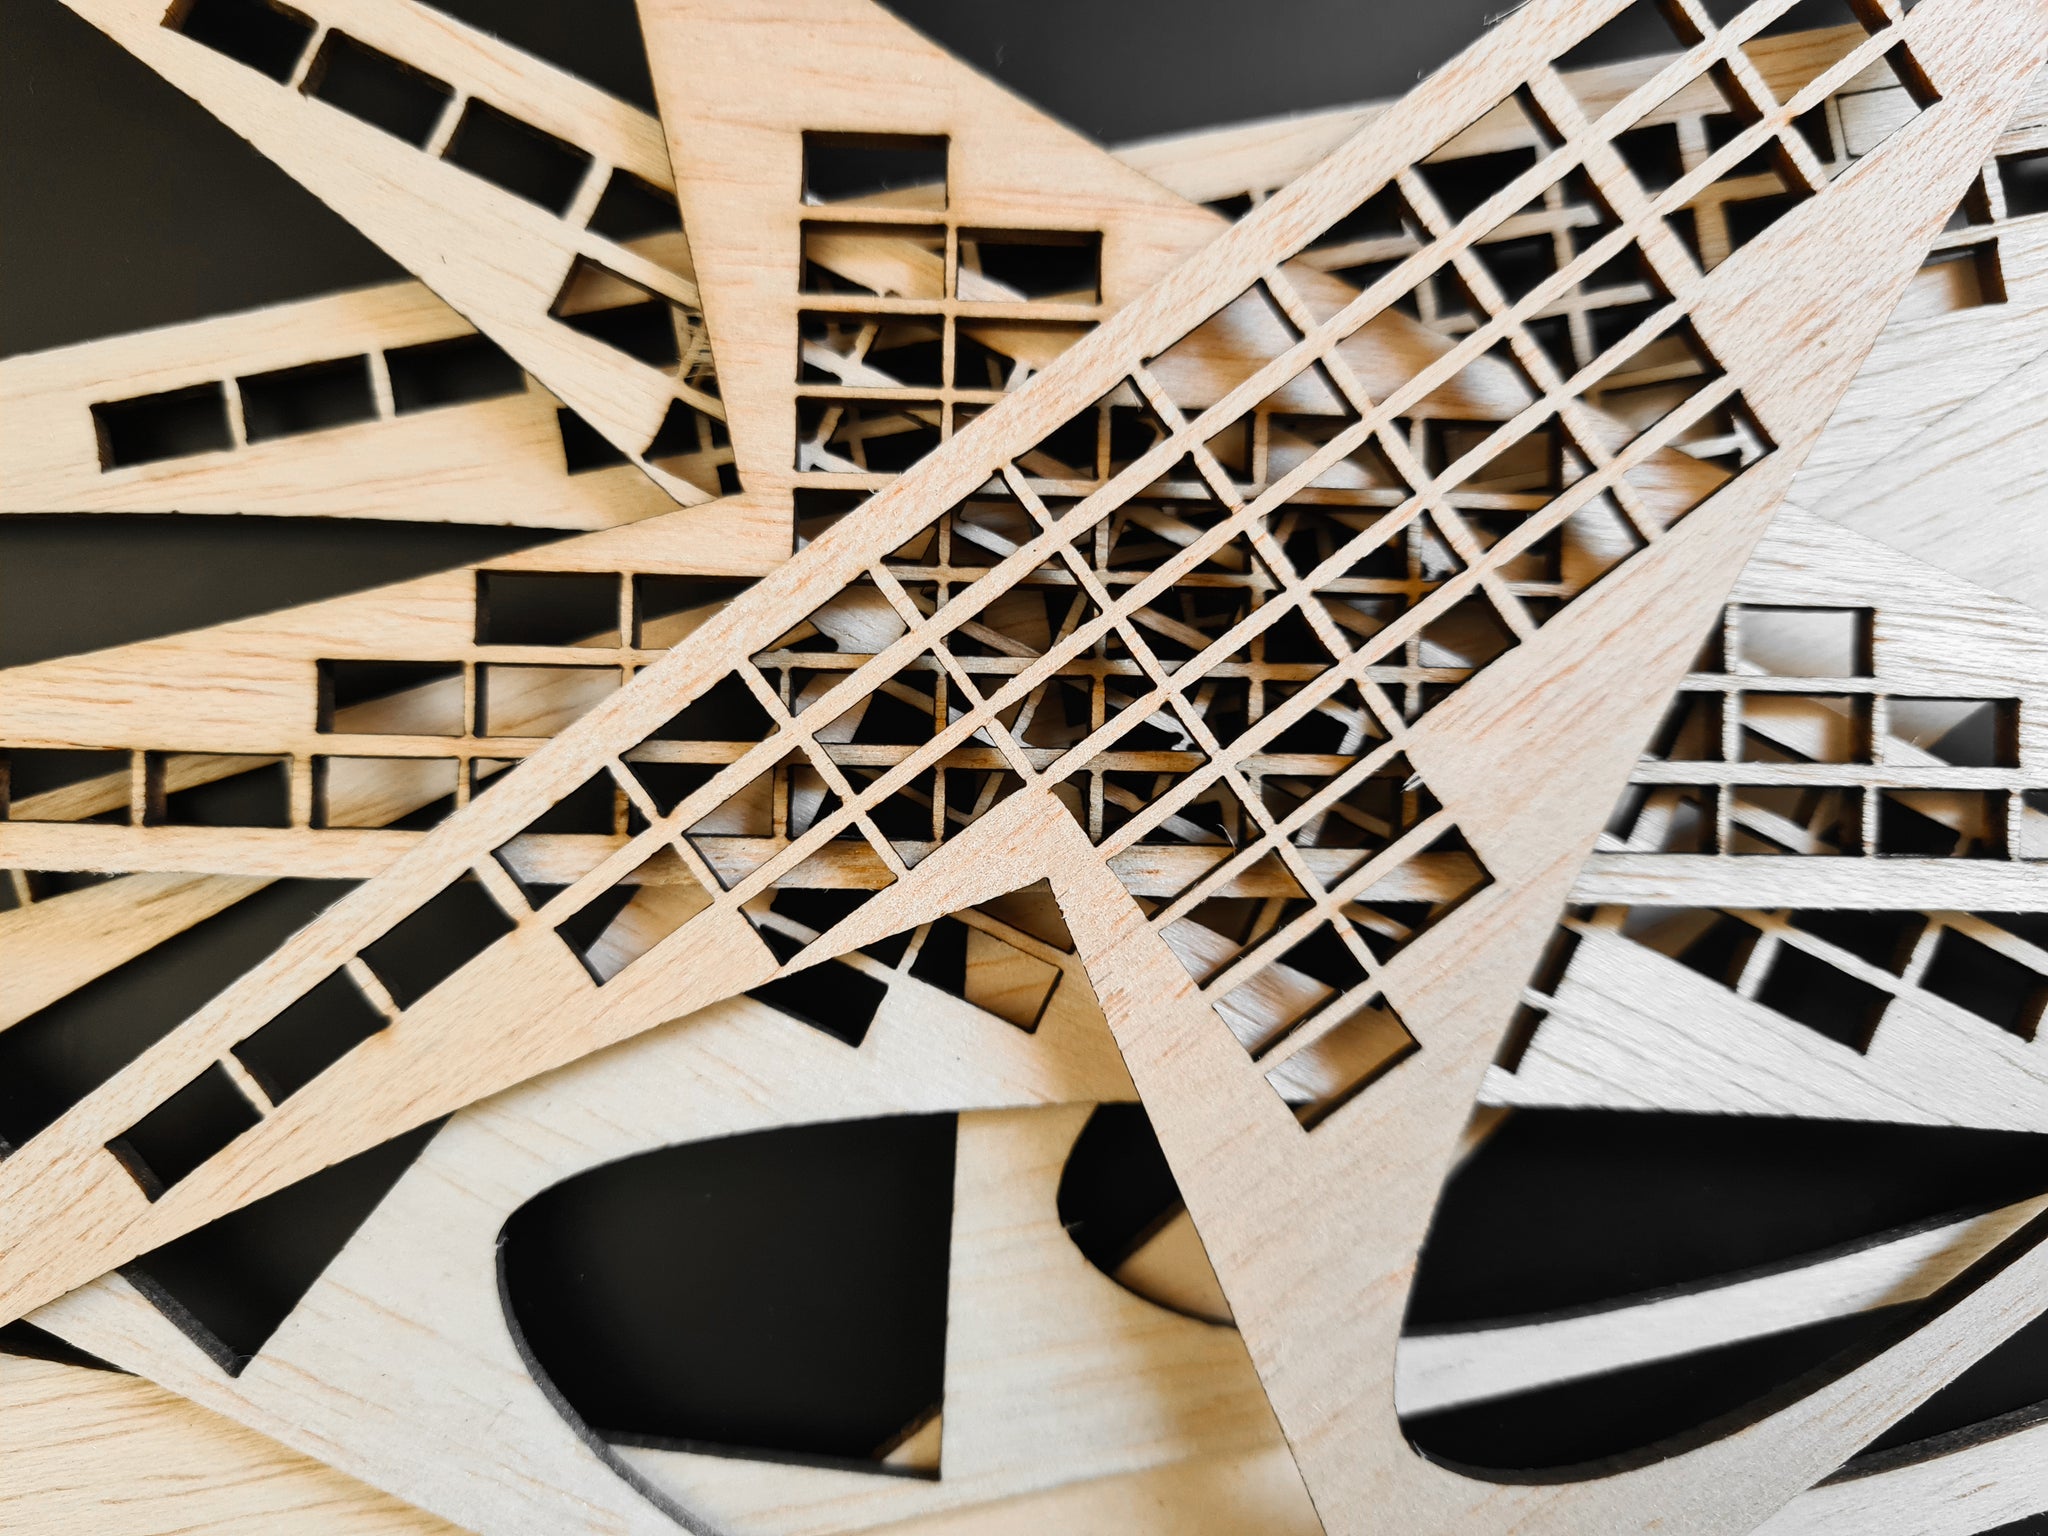
A LITTLE DEMONSTRATION!
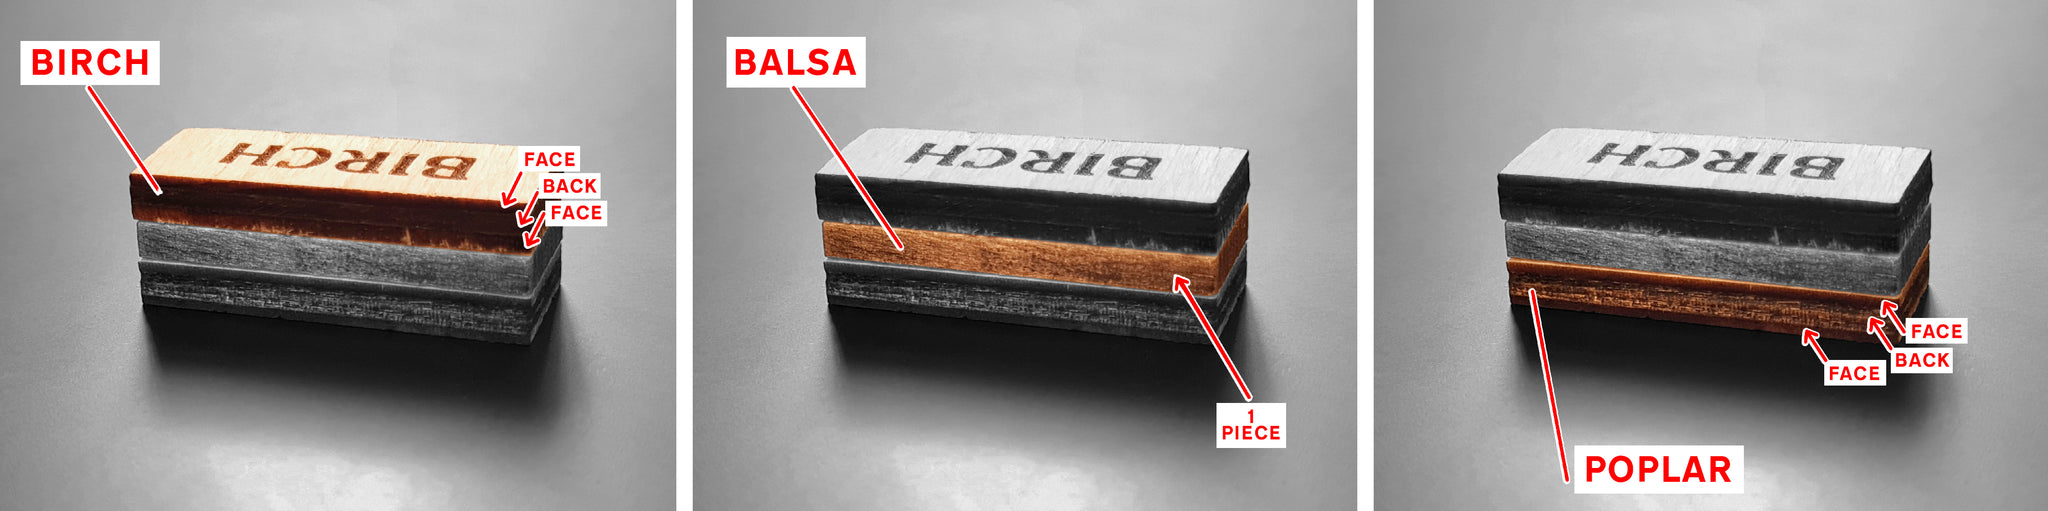
We generated some labels using Cuttle.xyz to show the difference between three types of wood commonly used for laser cutting. Plywood which is safe and easy to use with a laser cutter is called laserply (which is one of the names you will find it online when looking for material).

Since the density of each wood is different (birch being the most dense, poplar second and balsa being air-light in every sense), but the thickness of the materials were almost the same, only adjustments in passes and power were needed.
While 4mm poplar is cut clean with 2 passes with clean edge on 30mm/s speed and 100% power, birch is cut the cleanest with at least 3 (but ideally 4) passes on the same speed and power. Balsa wood, however, due to it being so airy and thin in density, will be cut through with a single pass using the same settings as above for speed and power. The engraving using the same settings on balsa wood would be too much, so we ended up adjusting it to 20% power instead of 30% only on that piece. Mind that these settings are used with a freshly maintained machine and focused mirrors and lens! Always keep your machines regularly maintained for consistently good performance.
When cutting balsa wood, you will notice that it makes less coloured smoke than poplar or birch. This is because of the glue between layers - balsa wood does not have layers, therefore the only components of the smoke are straight from the wood, and nothing else.

Kitronik offers a comprehensive guide on laser cutting plywood well according to their given parameters, which you can find here. Make sure to check out their videos on Youtube featuring Poplar laserply, as well as Ceiba laserply sheets!
WHAT TO DO WITH SCRAPS?
No matter how carefully you nest your items on the material, there will be leftover material. Oftentimes these leftovers can have a second life with just a bit of brainstorming!
You can make art, small things or tiny keychains, dollhouse furniture, toy targets for Nerf guns or similar, or reuse them and make pins to hold your material flat on all sides without the use of masking tape, and so much more! Get creative! If you need more inspiration, check out this video as well from Maker Tales. Cuttle.xyz is perfect for generating small and quick geometric designs or small keychains using parameters - we wrote an article about this software in the past, make sure to check it out!
You can use scraps for gardening as well: label up your seedlings and plants you keep forgetting how to call. Scraps are useful for spacers when it’s not important how such detail looks inside a closed object. If you are still left with any leftovers that you cannot use at all, remember this pile next time you are preparing for outdoors open fire cooking!

Show us your makes by tagging us (smoke_and_pictures) on Instagram and Twitter (@tweetsandmirrors) !
Happy making!
