In the Dutch equivalent of high school, all final year students have to write a final paper. Usually, students will do literary research or small experiments. Wanting to challenge themselves, Guus decided the thing to do would be to design and build their own mechanical planetarium (orrery), having never done a big woodworking project before.
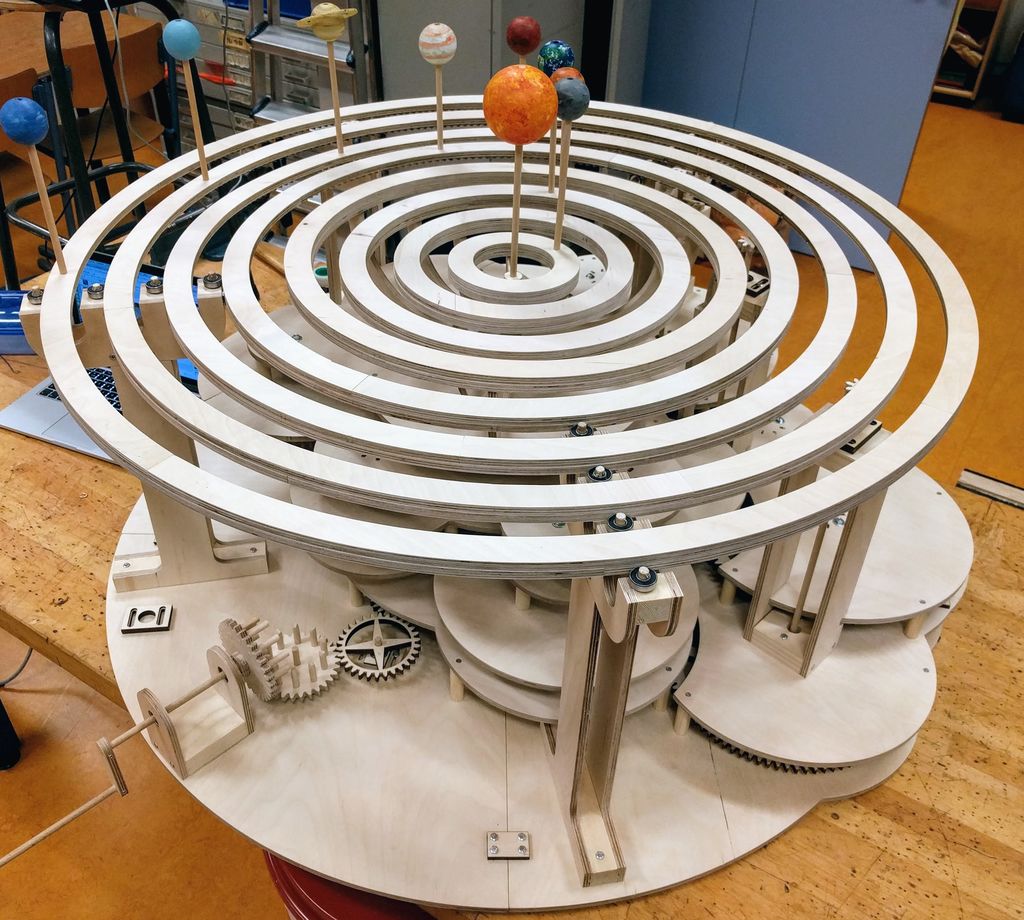
Before starting the design process, Guus set themselves some goals: 1. the entire thing must be designed and built by themselves, and 2. to show the difference in the circulation time of the planets around the sun as precisely as possible. They also wanted to set the planets on the correct relative position of each other, but after some tinkering in Fusion 360 they found that it would make the model much too big (shown below).

Once the goals and design were set, it was time to decide on the tools to use. Laser cutting was the desired method, but they did not have access to a laser cutter at the beginning of the project. They then settled on CNC milling all of the parts, but the CNC that they had access to had a few flaws, and when the school purchased a laser cutter halfway through the project Guus jumped at the chance to switch, and finished the rest of the project with the laser.

All in all, this is a very impressive achievement, and was a lot of firsts for Guus, who learned how to use Fusion 360, the CNC and laser software, and the gear making program specifically for this project. Not to mention that this was their first real attempt at woodworking. I highly recommend giving the full Instructable a read, as the entire process was thoroughly documented.